Step 3: Temper the Eggs
ADVERTISEMENT
Slowly pour about one cup of the warm cream mixture into the egg yolks while whisking constantly.
This prevents the eggs from scrambling.
ADVERTISEMENT
Gradually whisk the tempered egg mixture back into the saucepan.
Step 4: Cook the Custard
Cook over medium-low heat, stirring constantly with a wooden spoon or silicone spatula.
Continue until the custard thickens enough to coat the back of a spoon.
Ideal temperature:
- 170–175°F (77–80°C)
Do not boil.
Step 5: Add Flavorings
Remove from heat.
Stir in:
- Vanilla extract
- Salt
Mix thoroughly.
Step 6: Chill Completely
Pour the custard through a fine mesh strainer into a clean bowl.
Cover and refrigerate for at least:
- 4 hours
or preferably:
- Overnight
A fully chilled base produces the smoothest ice cream.
Step 7: Churn
Pour the chilled mixture into your ice cream maker.
Churn according to the manufacturer’s instructions, usually:
- 20–30 minutes
The texture should resemble soft serve ice cream.
Step 8: Freeze Until Firm
Transfer to an airtight container.
Freeze for:
- 3–4 hours
before serving.
Easy No-Churn Method
No ice cream maker? No problem.
This version is incredibly simple and still produces a rich, creamy result.
Step 1: Whip the Cream
Using a mixer, beat the cold heavy cream until stiff peaks form.
Do not overwhip.
Step 2: Prepare the Base
In another bowl, combine:
- Sweetened condensed milk
- Vanilla extract
- Salt
Mix until smooth.
Step 3: Fold Together
Gently fold the whipped cream into the condensed milk mixture.
Work slowly to maintain volume.
Step 4: Add Mix-Ins
Fold in any desired additions such as:
- Chocolate chunks
- Cookie pieces
- Fruit swirls
- Caramel ribbons
Step 5: Freeze
Transfer to a freezer-safe container.
Cover tightly.
Freeze for:
- 6–8 hours
or overnight.
Delicious Flavor Variations
Chocolate Ice Cream
Add:
- ½ cup cocoa powder
to the custard base.
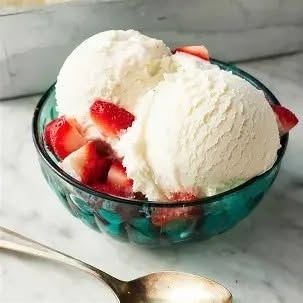
Strawberry Ice Cream
Fold in:
- 1 cup strawberry puree
after chilling.
Cookies and Cream
Mix in:
- 12 crushed chocolate sandwich cookies
during the final minutes of churning.
Salted Caramel
Swirl:
- ½ cup caramel sauce
through the ice cream before freezing.
Peanut Butter Swirl
Add ribbons of:
- Warm peanut butter
throughout the mixture.
Common Mistakes to Avoid
Overheating the Custard
Boiling can cause curdling.
Skipping the Chill Time
Warm bases produce icy textures.
Overfilling the Ice Cream Maker
Leave room for expansion.
Freezing Without Covering
Exposure to air causes freezer burn.
Storage Tips
Store homemade ice cream in an airtight container.
For best flavor and texture:
- Consume within 2 weeks
Place a sheet of parchment paper directly on the surface before sealing to reduce ice crystal formation.
Frequently Asked Questions
Can I make this recipe without eggs?
Yes. Use the no-churn version or substitute with a cooked cornstarch-based ice cream base.
Why is my homemade ice cream hard?
Homemade ice cream contains fewer stabilizers than commercial products. Let it sit at room temperature for 5 minutes before scooping.
Can I use low-fat milk?
You can, but the texture will be less rich and creamy.
How long does homemade ice cream last?
For best quality, enjoy within 2 weeks, although it can remain safe longer if stored properly.
Final Thoughts
Homemade vanilla ice cream is one of life’s simplest pleasures. Whether you choose the classic custard method or the convenient no-churn version, you’ll be rewarded with a dessert that’s creamy, flavorful, and made with ingredients you can trust.
Once you master the basics, the possibilities become endless—from chocolate and caramel creations to fresh fruit variations and gourmet mix-ins. One batch is all it takes to discover why homemade ice cream remains a timeless favorite. 🍨✨